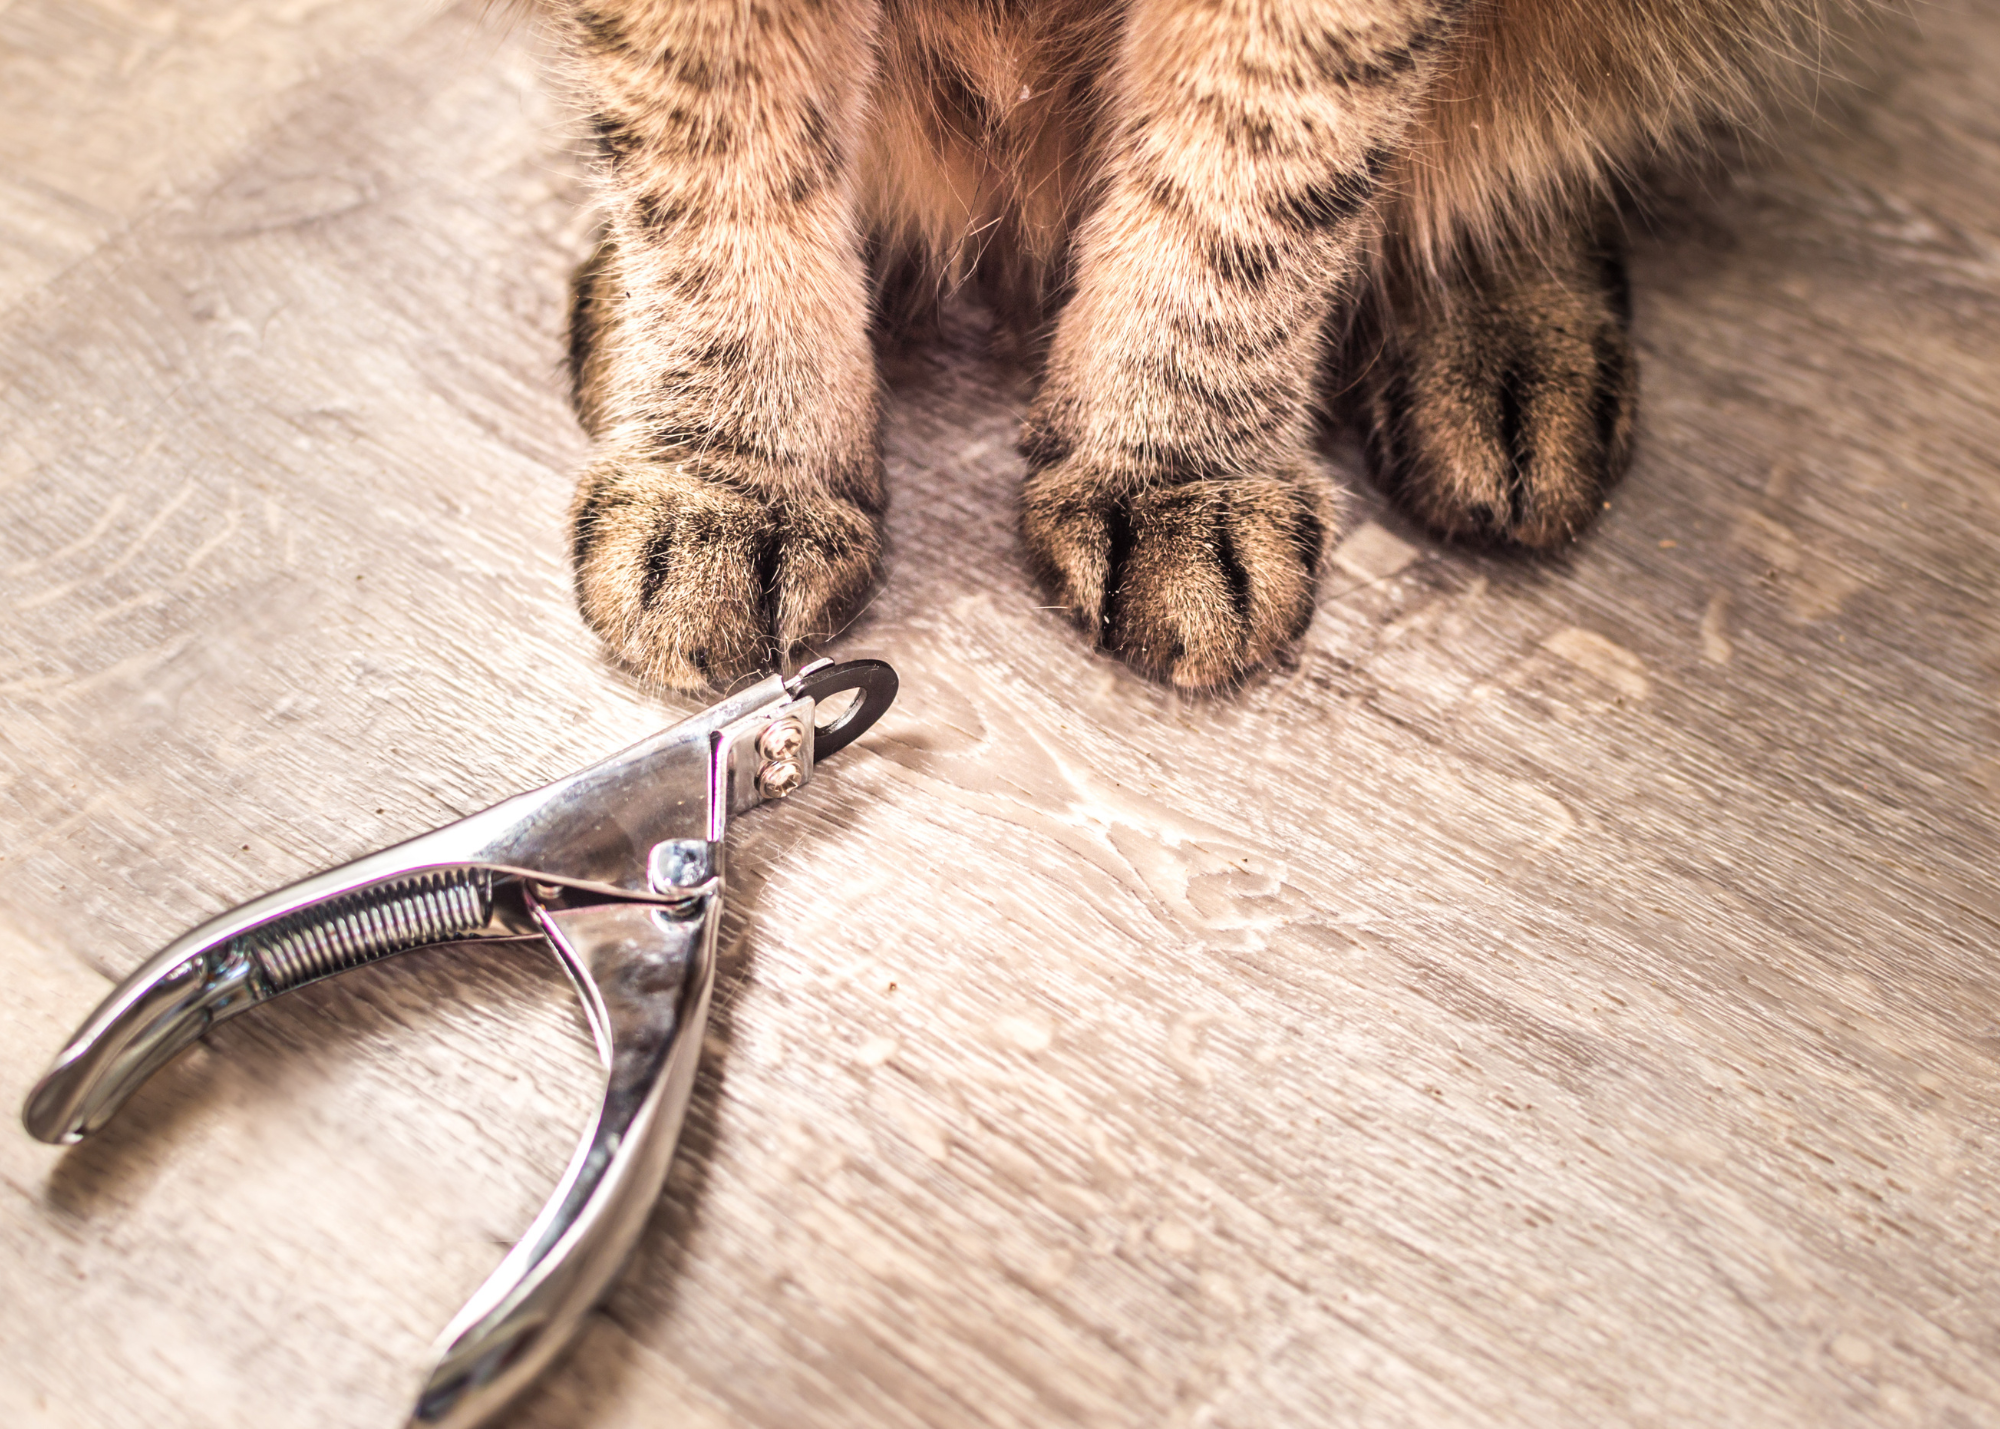
A Training Guide to Cat Nail Trims: Front Paws
As a cat guardian, you’ve likely wondered, “Do cats need nail trims?” And “If cat nail trims are necessary, how do you trim a cat’s nails?” Maybe you’ve even tried clipping those claws before but have yet to succeed or it was a stressful experience for everyone involved.
No matter where you are in your cat nail trimming journey, this post is for you! We will guide you through why regular nail trimming is important, how to trim cat nails using a clicker, and some other things you can do between trims.
Note: We are focusing on the front paws only to begin with. The reason for this is because your cat can easily see what you’re doing when working with their front paws, which makes the training process easier and less scary for them.
Disclosure: Cat School may receive commissions from affiliate links included in this article.
4 Reasons You Should Trim Your Cat’s Nails
Regular nail trimming is essential to maintaining your cat’s overall well-being. Cats need their nails (declawing is a harmful practice we would never recommend), but they can get too long, which can be uncomfortable for them and for you. While some cats’ claws may get filed naturally, most people need to trim their cat’s nails.
Learning how to clip your cat’s nails is important for several reasons:
- To protect yourself from getting scratched. Whether your cat is playing with you, making biscuits on your lap, or doing tricks like high five, their sharp nails can come into contact with you and hurt.
- For your cat’s safety. Long nails can get caught on things like carpet and furniture, potentially leading to painful injuries such as broken nails or having a paw stuck in a surface.
- For your cat’s comfort. If your cat’s nails get too long, they can even curl back on themselves and grow into their paw pads, which can cause pain, mobility issues, and infection.
- To protect your furniture. Nobody likes it when their nice furniture gets damaged. Trimming your cat’s claws will keep them from getting snagged on the couch or pulling on the living room rug.
Tools for Cat Nail Trims
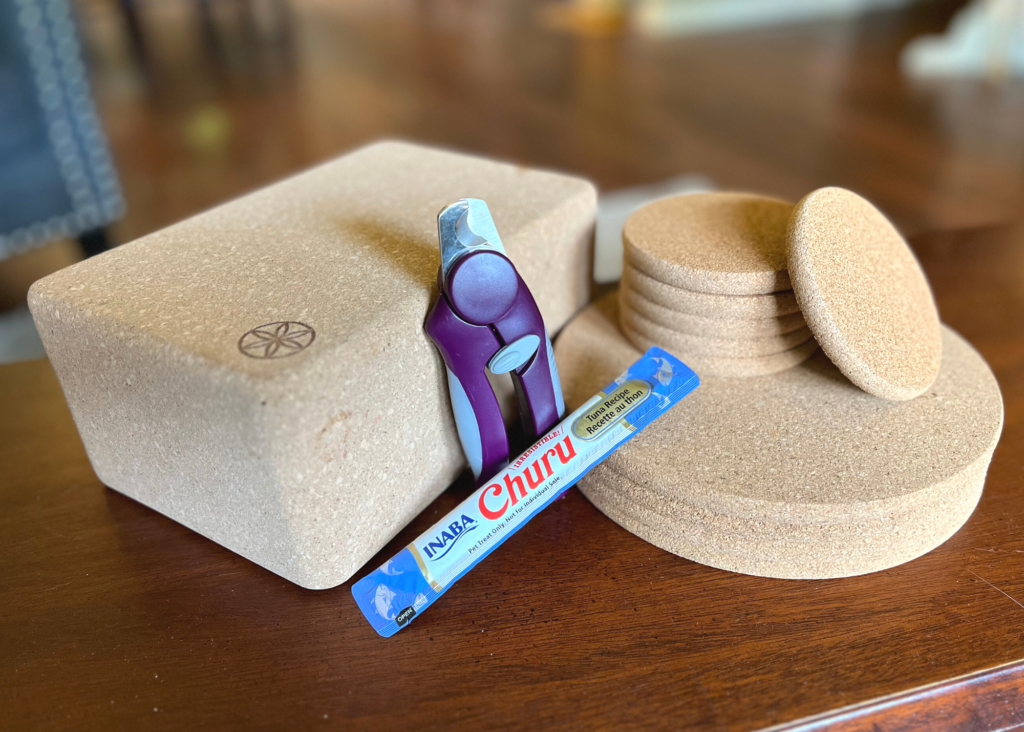
Having the right tools for the job is important! Here are a few things you’ll want to have handy before beginning your cat nail trims:
- Cat nail trimmers – You want something with a sharp, stainless steel blade so it will slice right through your cat’s claws without crushing them. You also want the clippers to be comfortable in your hand.
- Your cat’s favorite high-value treat – Churus work great for this!
- A clicker – You will use the clicker throughout the process.
- Targets – You will use these targets to work on your cat’s paw handling. Targets include cork yoga blocks, trivets, and coasters.
- Styptic powder – Although we hope this never happens, if you accidentally trim your cat’s nails too short, you can quickly stop bleeding with this powder. Cornstarch also works well.
- Patience – It’s good to set reasonable expectations. The nail trim process can take weeks and months, depending on your cat’s level of fear and how often you practice. Consistency is key; lots of easy sessions will help your cat overcome their fears of the nail trim process.
How to Trim Cat Nails Using Clicker Training
Now that we’ve established the importance of trimming your cat’s claws and the necessary tools, it’s time to move on to the training steps.
Many cats aren’t fans of nail trims because restraining their paws is a scary sensation. The good news is that with time, patience, and a detailed training plan, every cat (even the most fearful) can learn that nail trims are not scary. The goal is to make the experience as positive and stress-free as possible.
There are four phases to improving your cat’s response to nail trims. As you work your way through the training steps, it’s important to remember to take things slowly and always keep a close eye on your cat’s body language. If you notice your cat is stressed (e.g., not eating the treat or walking away from your sessions), stop and try again later by making it easier.
Phase 1: Making positive associations with the nail clippers.
The nail clippers themselves can be a scary tool, so the first goal is to show your cat that good things happen when the tool comes out. We want your cat to see the tool and get excited about it – like really really excited because they know they are going to get their favorite treats. Reserve the highest value treat for this training so your cat only gets it for nail trim training.Steps to building that positive emotional response to the nail clippers:
- Bring the clippers out first. As soon as your cat notices them, present your cat with a high-value, delicious treat. Reserve this treat only for this training.
- As soon as you stop feeding, immediately put the clippers away.
- Wait a few seconds and repeat the process once or two more times.
- Practice this exercise in a few locations so your cat is surprised to see the trimmers and then excited to see the treats.
- Try to do two short sessions per day.
Tip: Make sure your cat sees the clipper FIRST before the food. If your cat is distracted by the food and then the clippers come out, the training won’t work.
How will you know it’s time you move on?
Look for any of the following behaviors:
- Sniffing the clippers
- Head bunting the clippers
- Purring at the sight of the clippers
Phase 2: Getting comfortable with body handling and touch.
The goal with this phase is for your cat to accept general body handling. You want your cat to know that when you touch them, good things happen (they get treats).
- Start in the zones where your cat is comfortable with touch (for example, on their back and sides), and present food AFTER the touch. You can also start the touch and then present the food so that they overlap before simultaneously removing the food and the touch.
- Repeat while gradually gliding your hand to the more challenging zones.
- Continue to practice until your cat is comfortable with gentle touches all over.
Tip: Lickable treats or licking wet food off of a spoon work well for this phase.
How will I know I can move on?
By the end of this training phase, your cat should be comfortable with you touching their legs and paws.
Note: Training on a chair can be a helpful tool to encourage stillness. You tell your cat it’s time to participate in their daily handling sessions, and your cat (by staying on the chair) communicates that they are willing to participate. If your cat leaves the training station, that’s a sign you need to make it easier or more worthwhile with higher-value treats.
Phase 3: Willingly presenting paws.
This nail trim training process is designed to get your cat beyond tolerating nail trims to becoming an active participant. The goal is that, instead of grabbing your cat’s paws and trimming (this can be aversive), your cat will willingly present their paws to you for handling.
We use various props (targets) for this phase, including the cork targets mentioned earlier. If you substitute other targets, ensure that they are not slippery.
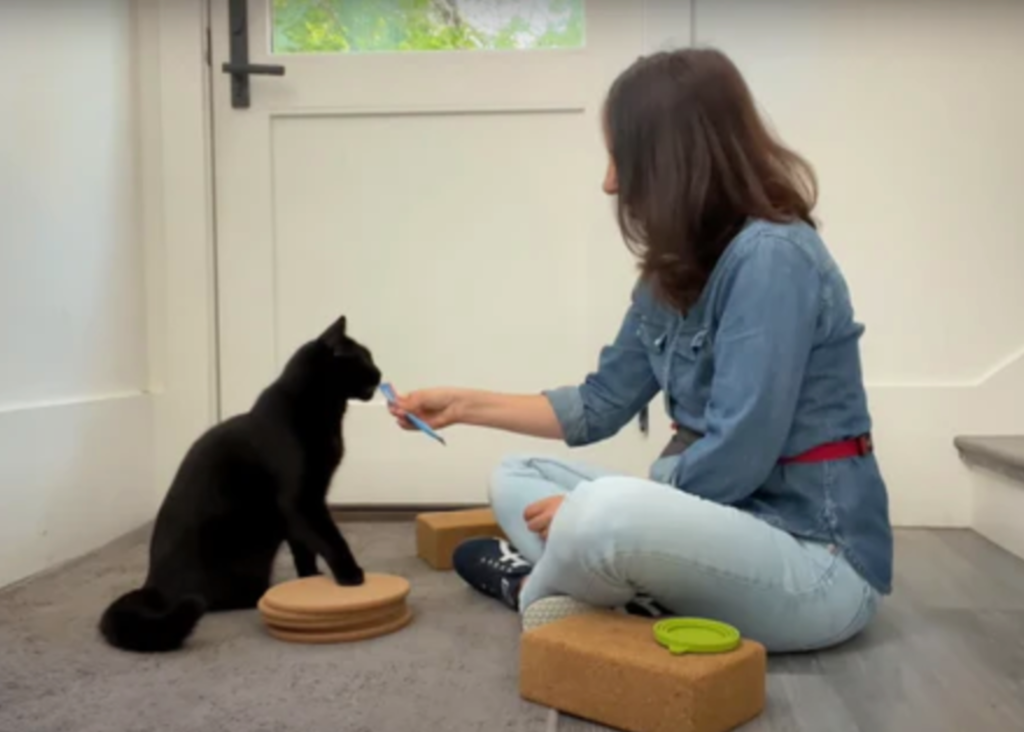
With each step outlined below, you want your cat to consistently perform the behavior 4-5 times in a row before moving on to the next step.
- Teach your cat the “two paws on” behavior using a yoga block. Watch this YouTube tutorial video for the full training steps.
- Fade out the lure. Your cat should notice the targets in the environment and offer the “paws on” behavior on their own.
- Isolate the dominant paw. In the previous steps, did you notice if your cat favors a particular paw by stepping on the block with that paw first? If so, that’s the paw you want to start with for this step.
Position the yoga block to encourage your cat to use one paw to step onto it. You might need to experiment with the placement by putting it off to the side, for example. Click and reward when your cat steps on the block with the correct paw.
Note: If your cat steps up with the wrong paw, lure them off and feed them the treat with the correct paw on the block. Only click for the action of the correct paw moving. This is not an easy step, and you may need to experiment with moving the block around. - Make your target smaller. Once your cat is comfortable with Step 3 and consistently only puts one paw on the block, repeat the step with a stack of cork trivets or other smaller prop, and then eventually with the even smaller cork coasters. The goal is to reduce the size of the prop so it’s small enough to fit in your hand.
- Raise the target. Instead of stacking your cork coasters on the floor, it’s time to pick one up in your hand to raise it off the ground. Get your cat to repeat placing their paw on the target in your hand.
- Introduce the paw shake. Using your coaster target in your hand, get your cat to present the paw you want and introduce some gentle paw touching. The goal here is to get your cat comfortable with you handling their paw for around 3 seconds. You can even feed your cat while you’re touching their paw.
Note: Note: If your cat pulls away, reduce the length of the touch. Be sure not to click when your cat pulls away because you don’t want to reinforce that behavior. - Fade out the target. Present your hand (with no target) to your cat on the side for the paw you want. They should present their paw and place it in your hand.
- Introduce the other paw. Repeat steps 3-7 with the other side.
Note: If your cat has trouble presenting the other paw, use your yoga blocks to create stairs. Use your food reward to lure your cat up the stairs. They will have to step one at a time, and when they step with the paw you want, click and reward.
The end result of this training is that you have a reliable signal to get your cat to present EACH paw. Your cat should understand when you present your hand off to the side, that signals for them to present the paw that’s closest to your hand. You can then continue to improve your cat’s response to nail trims.
Phase 4: Extending the nail, touching clippers to nails, and clipping!
Now that your cat is willingly presenting their paws and is comfortable with the presence and touch of the nail clippers, you can reach the nail trim finish line by working on extending the nail, touching the clippers to nails, and finally clipping.
- Extend one nail. Reward your cat. Work systematically through each paw, feeding treats after each nail extension.
- Touch the clippers to the nail. After your cat presents their paw, extend one nail and gently touch the clippers to it. Repeat with each nail, gradually increasing the time your cat is comfortable with you holding their paw.
If your cat tries to pull away at any point, let them. We want them to always feel in control. Continue to give your cat food even if they pull away, as the goal is to pair the training with a positive outcome (food). Some students might worry that they are reinforcing their cat for pulling away, but we are addressing the fear, not the action, so it’s OK to give treats even for the incorrect behavior. However, it’s always best to back up a step and make it easier so your cat doesn’t present the pulling away behavior. - Cut a nail. Use the clippers to clip one nail at a time, rewarding after each one. It’s okay if you aren’t able to do them all in one session. Repeat the process and continue rewarding.
Here is some important information to review when it comes to clipping your cat’s nails:
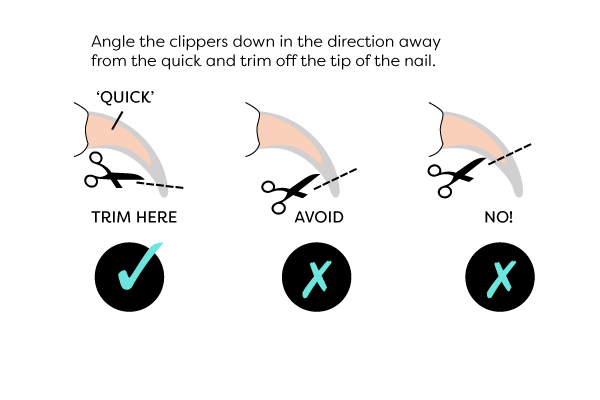
- The quick is the blood supply that runs through the nail. We always want to be mindful to not hit the quick. If nail trims cause your cat pain, they will be even more fearful and anxious about the process.
- Just take the tips off. Clip often and take a tiny bit off each time. This practice will keep you from ever getting too close to the quick and improve your skills at cat nail trims. The more you practice the better your cat will be at holding still and waiting for their treat.
It Takes More Than Just Nail Trims
Cat clawing and scratching is a frequent complaint of many cat owners. Regularly trimming your cat’s nails helps minimize damage for sure, but if you want to keep your cat from scratching your furniture, you’ll need to take a couple additional steps: training and providing plenty of scratching posts!
Scratching is an instinctual behavior, so instead of trying to stop the behavior, you want to redirect it. You can find a wide range of cat scratchers – from vertical and horizontal ones, to cardboard or carpeted ones, and more. Get a few different styles, and place them in various areas of your home – especially near the places they tend to gravitate towards.
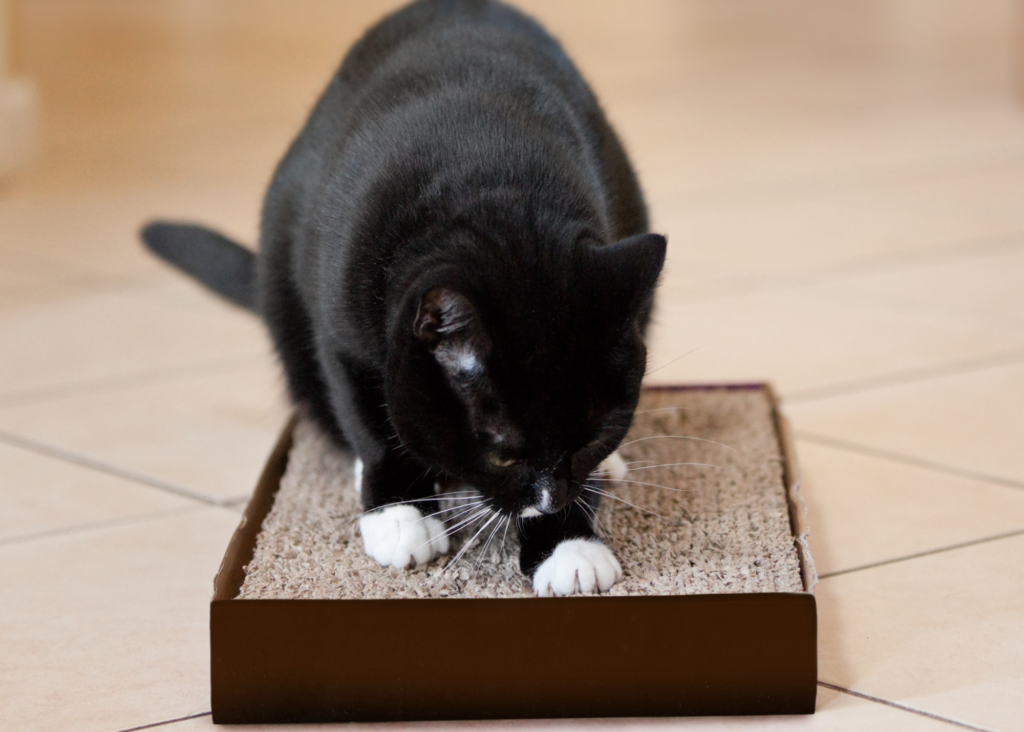
In addition to scratch training, be sure to maintain your nail trim training by practicing between clipping sessions. A veterinarian might advise you to clip your cat’s nail once every two weeks. A behaviorist says “practice every day.” At zoos and aquariums, they practice blood collection simulations 100 times for every real one. Likewise, don’t just wait until your cat needs their nails trimmed to get the clippers out. If your supplies are close by, you will be inclined to practice often. Be sure to touch your cat’s paws, extend their nails, and maintain that comfort with them allowing you to handle them in this way.
Cat Nail Trim FAQs
- What about the back claws? Working on the front paws is different than working on the back paws because a) the cats can easily see what you are doing, so it’s a little less scary, and b) front and back claws grow at different rates.
Many people find that back claws grow slower. That doesn’t mean you can ignore them, but focus on the front paws first to help your cat understand what’s going on. Then turn your attention to training the back paws.
Trimming the back paws is easier when your cat is lying down (relaxed on one side), so once you’ve done Phase 1 and Phase 2, your cat should already see the trimmers as a good thing and be comfortable with you touching back paws.
At this stage, you will skip Phase 3, but that doesn’t mean you won’t be doing clicker training. Instead, focus on teaching your cat to lie down on cue, making the process easier because you can signal your cat to lie down when you are ready to practice nail trims on the back paws. Once your cat has a good down signal, focus your attention on Phase 4. - Is using a dremel tool okay? While it is possible to teach a cat to accept a dremel that would be a different training plan because the cat would need to be desensitized to the sound and vibrating of the tool.
- Can I use human nail clippers on my cat? Yes, it is possible, but I prefer to use pair clippers designed for cats.
- Do I need to trim my outdoor cat’s nails? Maybe. This will depend on how much they get filed based on their outdoor activities. Some cats are more active than others, for example, by engaging in climbing trees and scratching fences. A cat’s behavior and activity can change as a they get older so while they may not need it now, it’s still wise to do the training process. Plus, if your cat gets something stuck in their paw, they will need to be comfortable with handling so you can remove it.
- How often do I need to trim my cat’s nails? Just like with human nails, cat nails grow at different lengths. Generally speaking for indoor cats though, you’ll probably need to perform claw trims every 2-3 weeks. Check on kitty’s nails every so often to see how sharp they are and to determine if it’s time for a trim. An outdoor cat may need nail trims less frequently.
- What if I can’t get every claw trimmed during a session? That’s okay! Clipping one or two per session is absolutely fine and encouraged so you can make it a positive experience.
- Is cat declawing bad? Yes! It is a cruel and painful procedure that can cause serious behavior and health issues for your cat. Thankfully declawing is becoming illegal in more and more places, and there are many veterinarians who will refuse to perform the procedure.
- Is it okay to muzzle my cat during nail trims? No. Muzzling can be scary and stressful, leading your cat to further associate nail trims with negative experiences. The goal is for the cat is comfortable with nail trims so they are not at risk of biting. If you go through the training process outlined above, muzzling will not be needed.
- What do I do if I need to cut my cat’s nails during the training process? If you’re still working on your nail trim training but need to clip your cat’s nails in the meantime, you can use the distraction method. With this method, you give your cat a squeezie treat or lick mat to distract them and keep them occupied while you trim. Watch the video below for a demonstration
If you run into any trouble throughout the training process or would like help teaching your cat to lie down on cue for their back paw nail trims, head on over to Cat School to access full training tutorials (including video demonstrations). You’ll also be able to ask questions and get personalized feedback and assistance from cat behaviorist and trainer, Julie Posluns.

